News
OpenAI Codex CLI, the standalone GPT-5 ⇆ computer interface that’s being positioned as a coding assistant, got a major overhaul. It was rewritten from the ground up, and many useful features were added:
- IDE integration
- there now is a Visual Studio Code extension
- How to activate: click on the OpenAI bloom logo on the upper right to open the Codex pane:
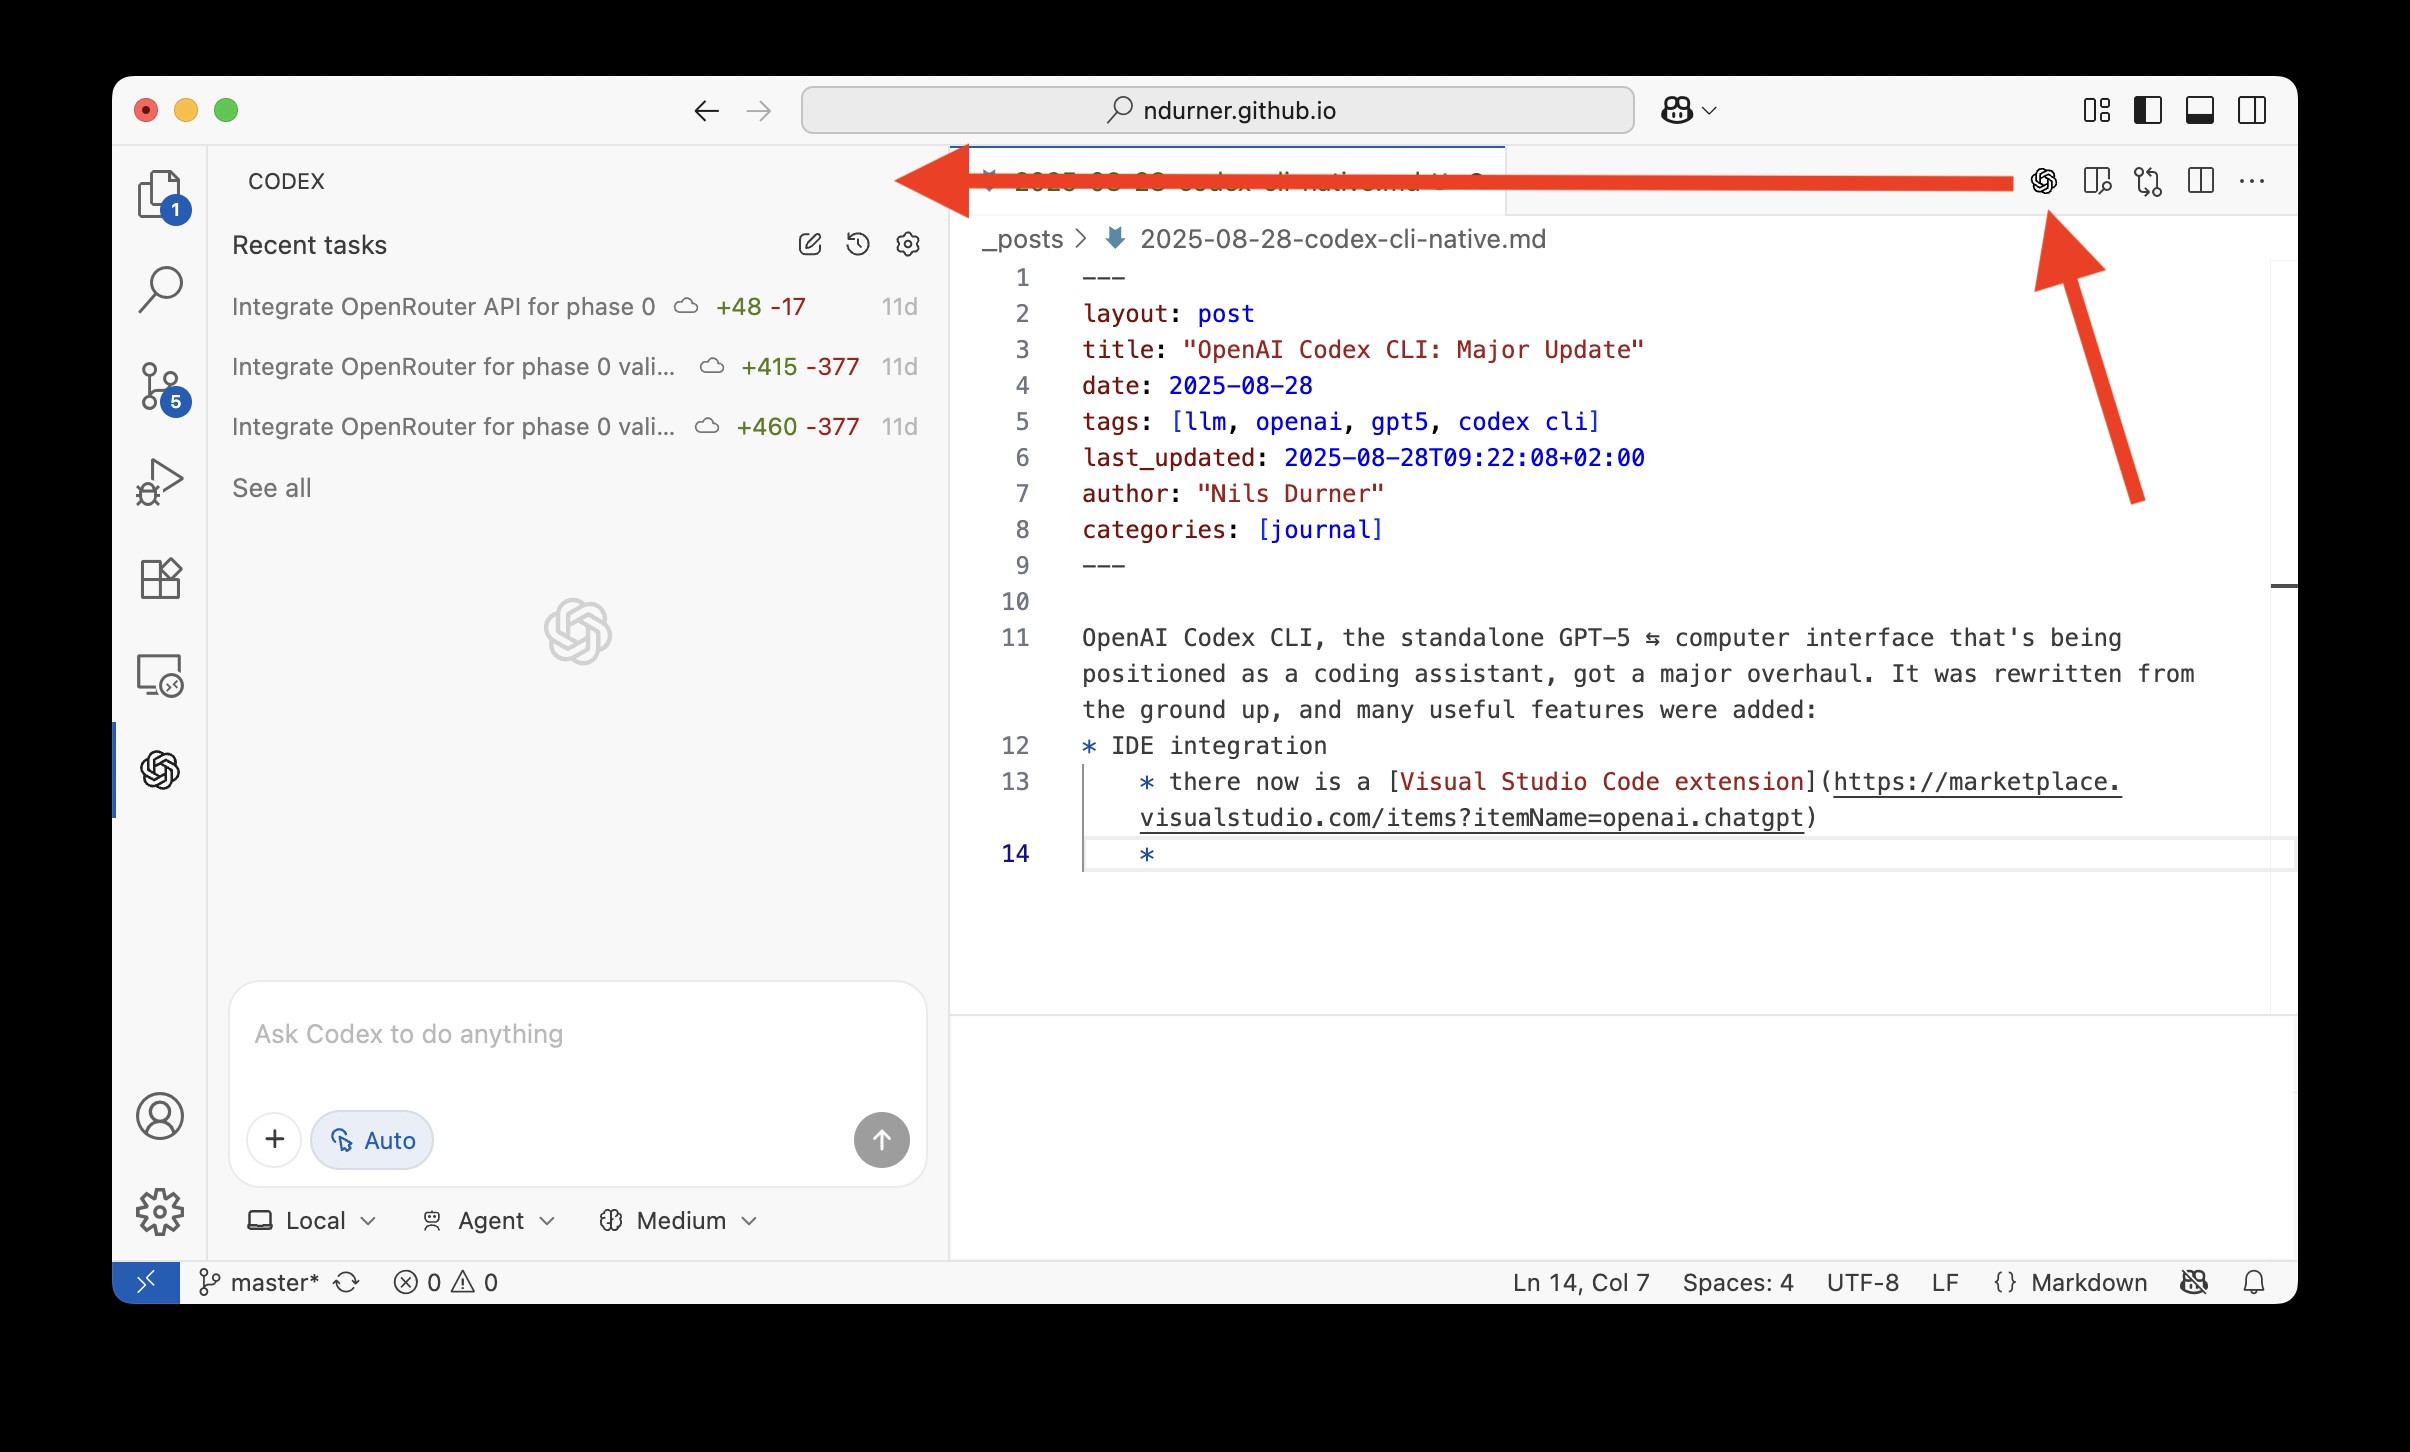 . Alternatively, click on the OpenAI logo on the very left pane. This lets you view “Recent tasks” (at the top) and send a new request to GPT-5.
 - Noteworthy features
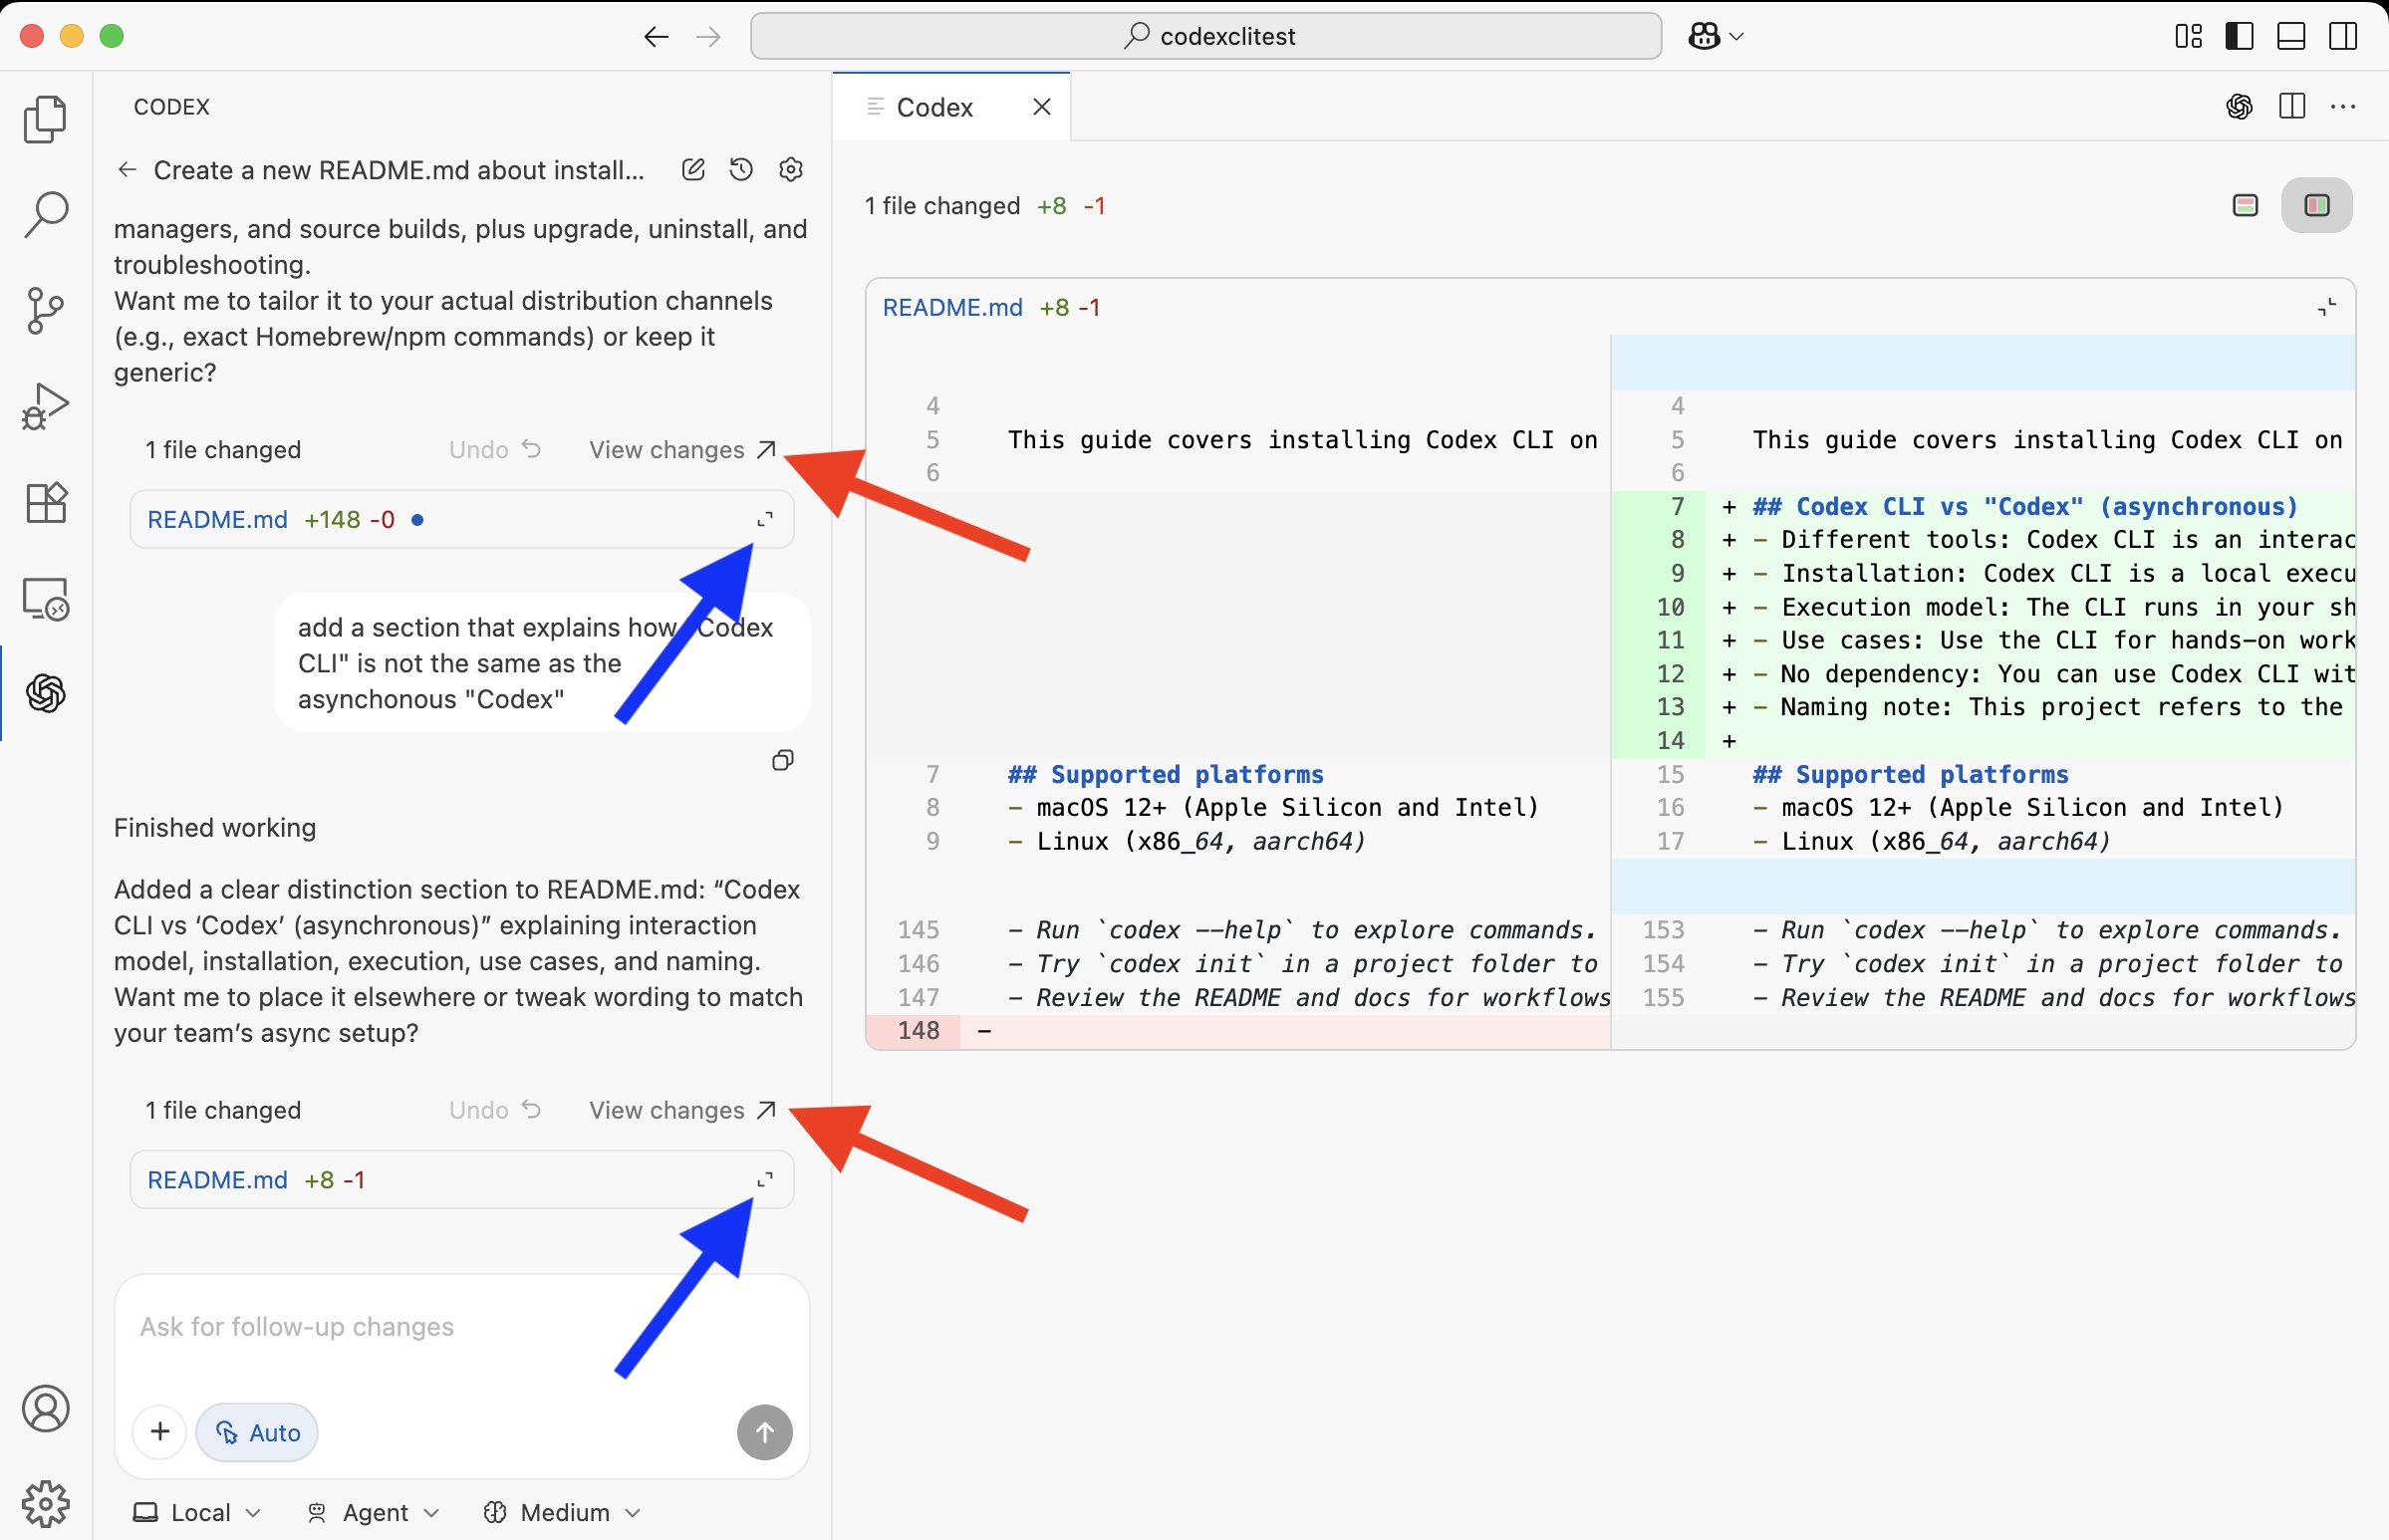
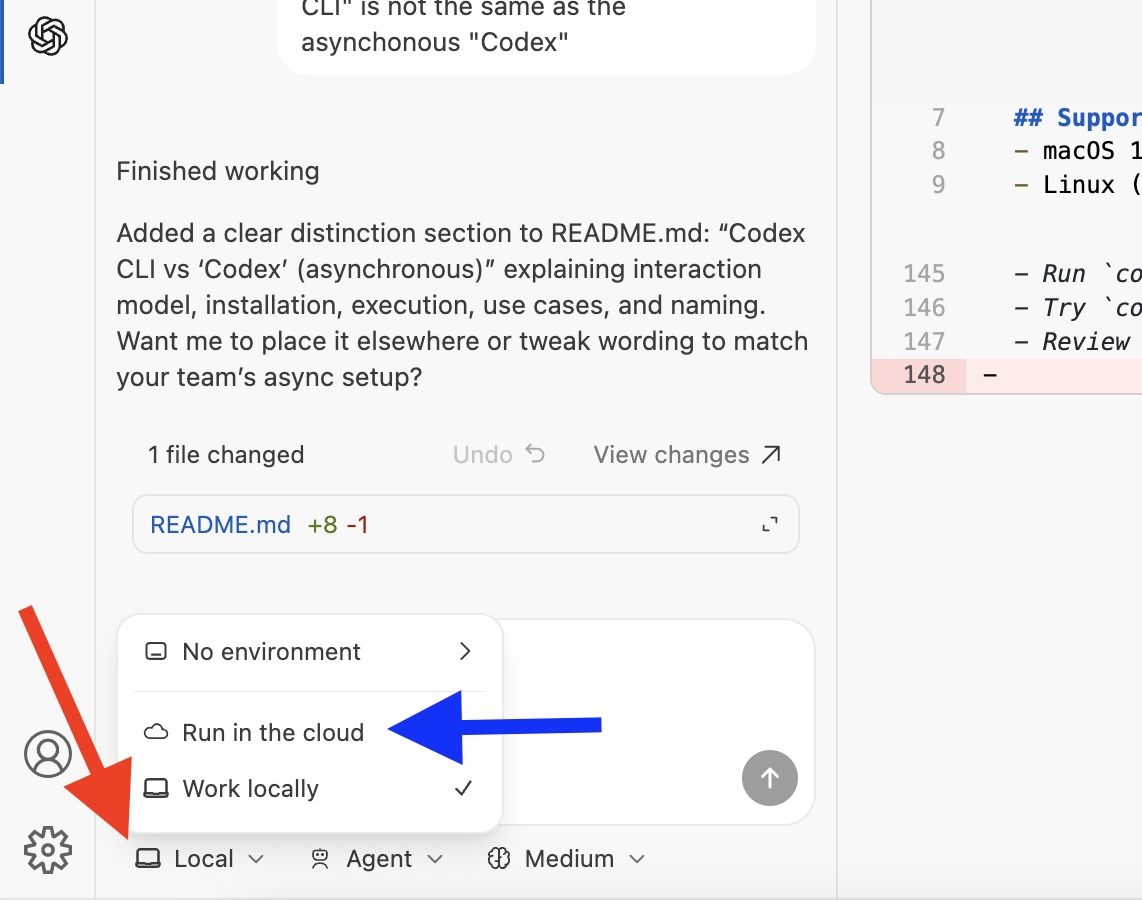
- Graphical diff/patch view: lets you view the changes it made right in VSCode, either inline within the chat pane (blue arrows) or in the full document view (red arrows)
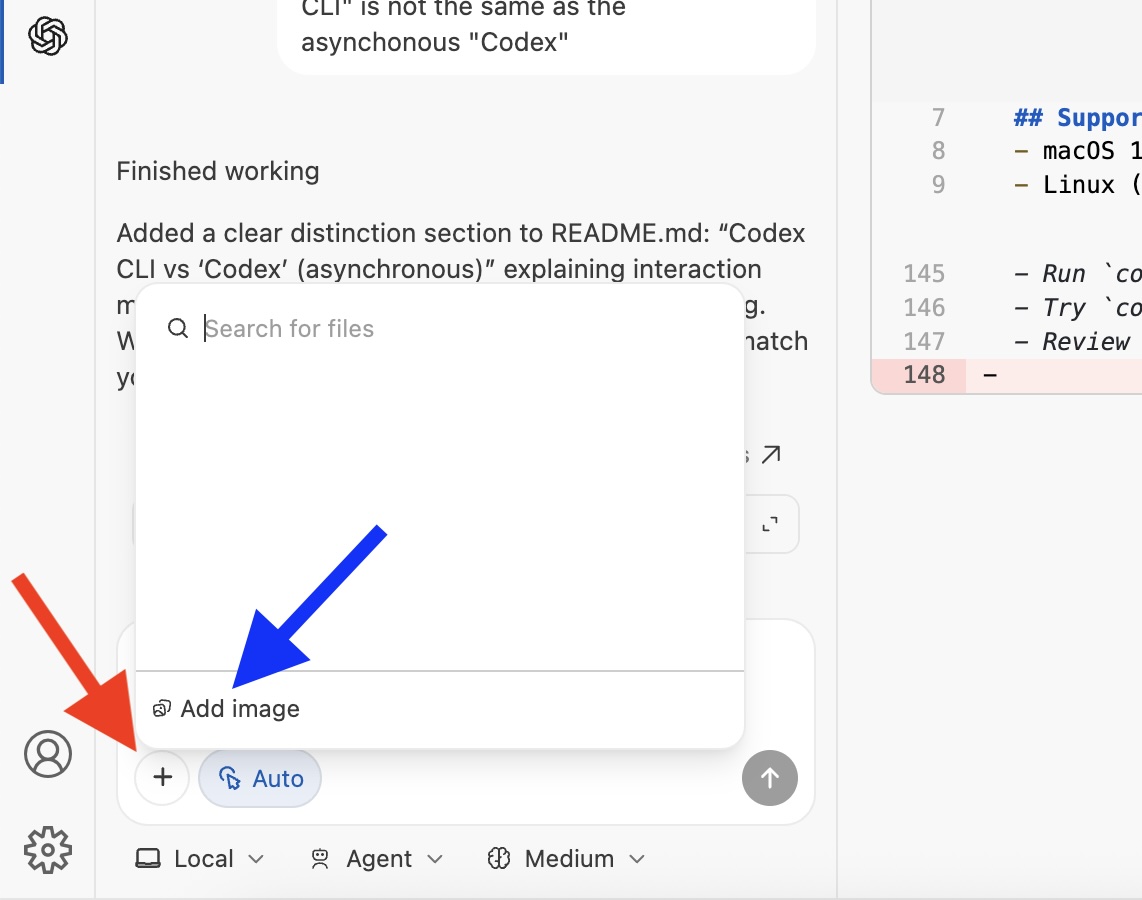
- Attach images throughout the chat. Codex CLI via the terminal (described below) allowed submitting only one image until a few days ago. Now, you can add images throughout the conversation just like in ChatGPT:
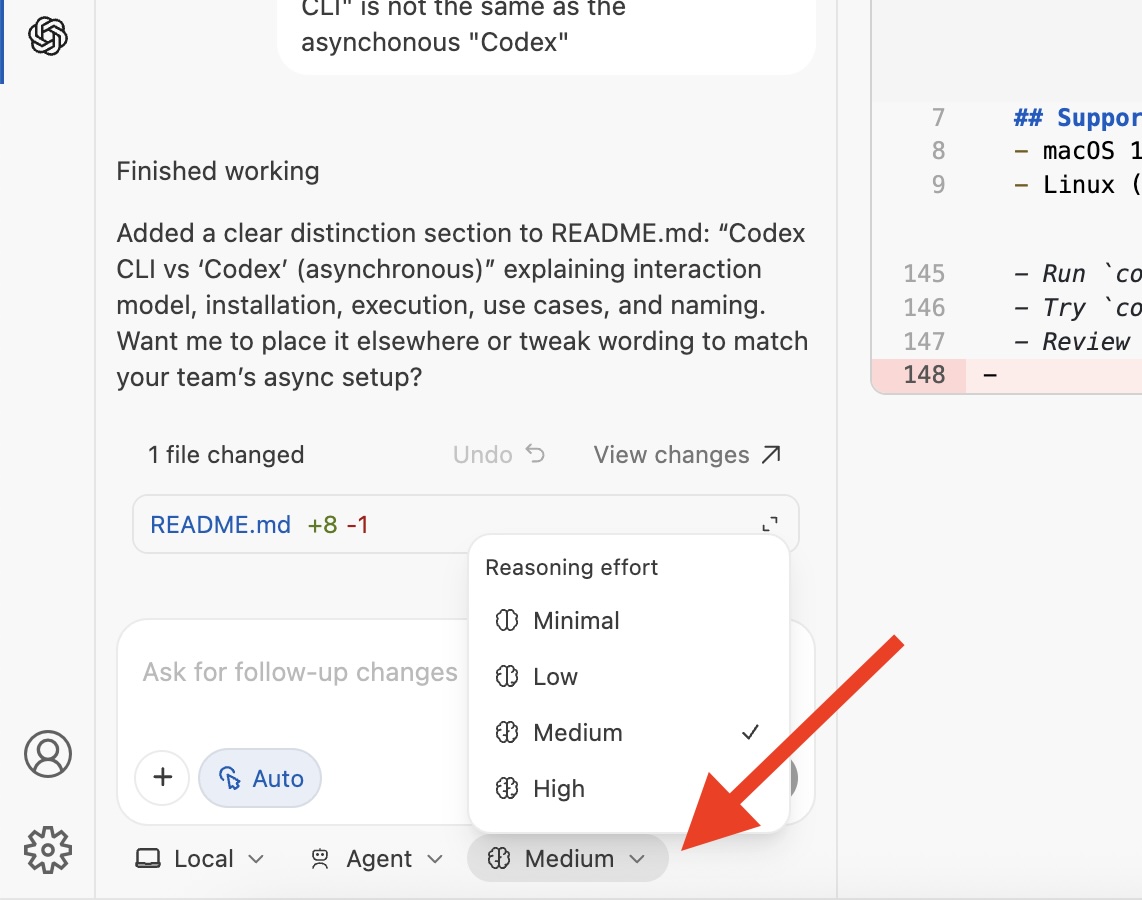
- Switch “reasoning effort” during the conversation, rather than just at startup:
- integration with the asynchronous variant of the Codex:
- Graphical diff/patch view: lets you view the changes it made right in VSCode, either inline within the chat pane (blue arrows) or in the full document view (red arrows)
- Terminal version
- improved look & feel, including better compatibility on Windows
- improved operational quality (maybe due to GPT-5)
- improved look & feel, including better compatibility on Windows
- Web-search (through the DuckDuckGo search engine), with follow-up crawling:
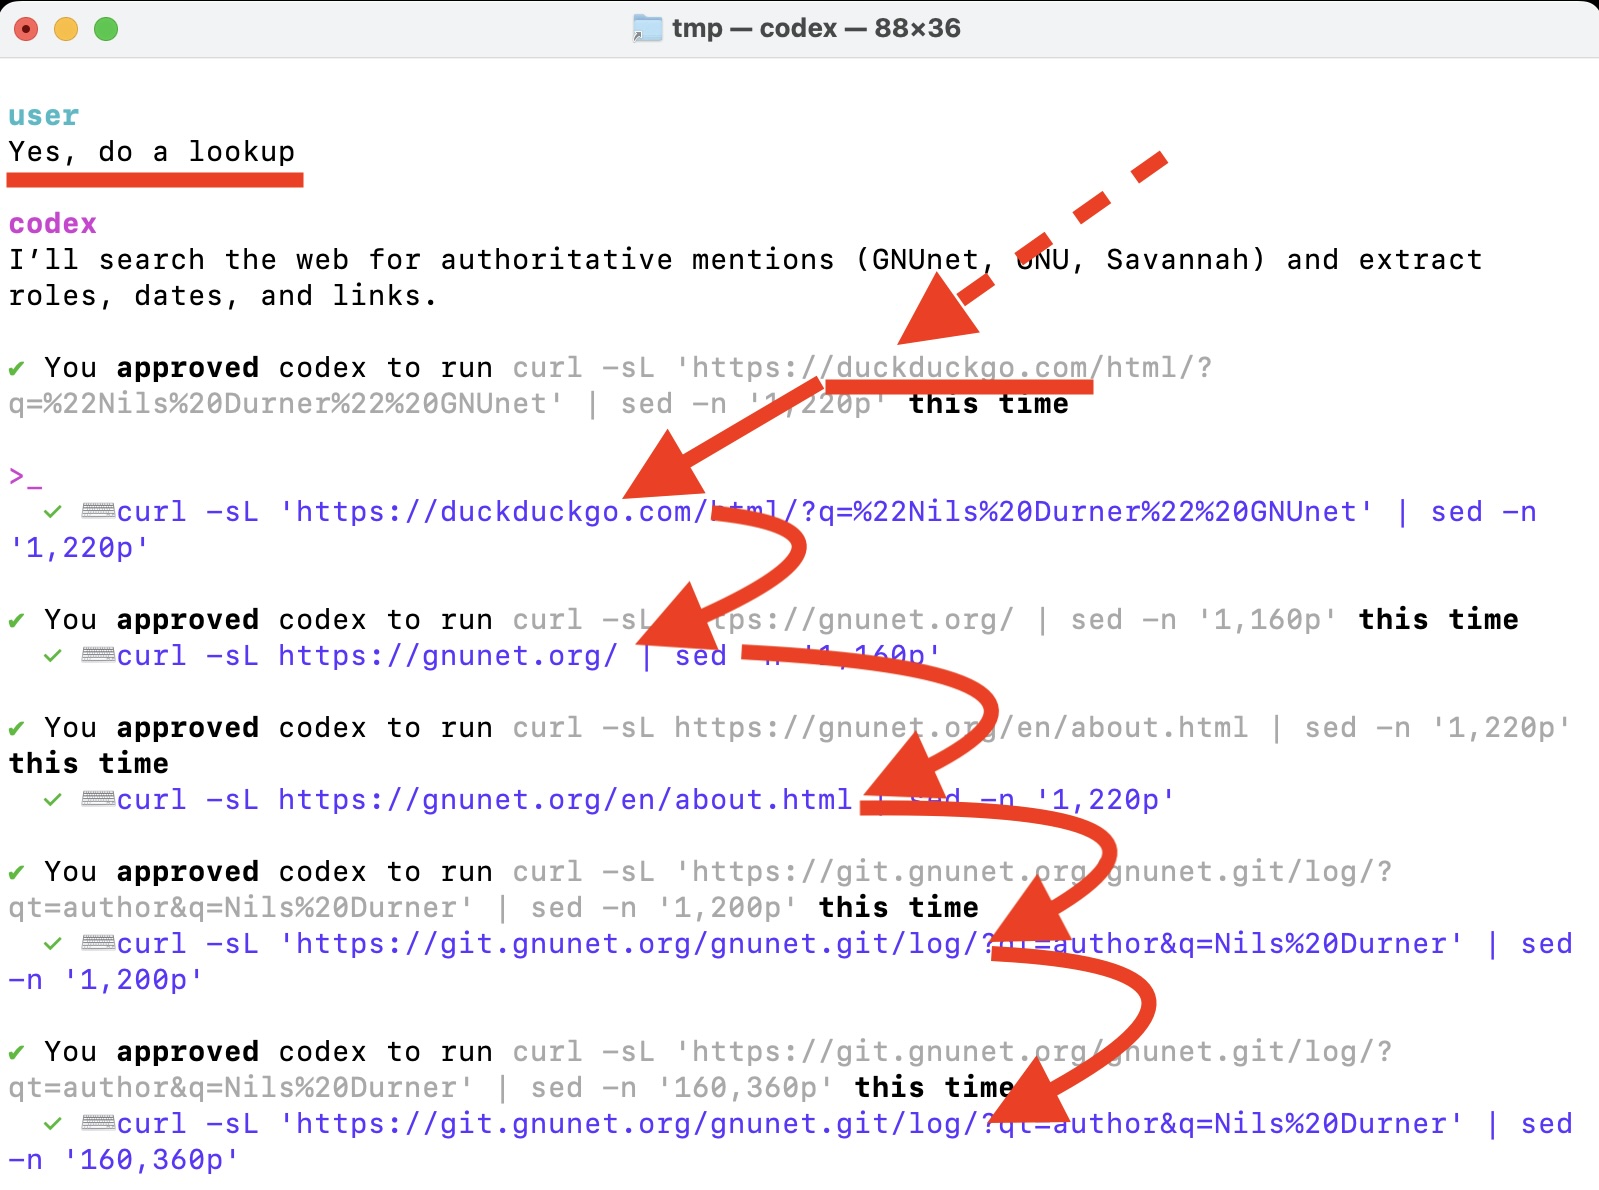
- Web-retrieval needs lots of nudging and will only consider partials, though. They are on it.
Getting Codex CLI
Users who just want to use it within Visual Studio Code, installing the extension is sufficient. For those who want to (also) use the text-oriented interface (TUI), Codex CLI needs to be installed through the dedicated installation package.
The new Codex CLI version was available before as ‘@codex/codex-native’. That’s not longer true (and leads to an outdated version), the official ways to install Codex CLI are:
npm i -g @openai/codex- on macOS:
brew install codex
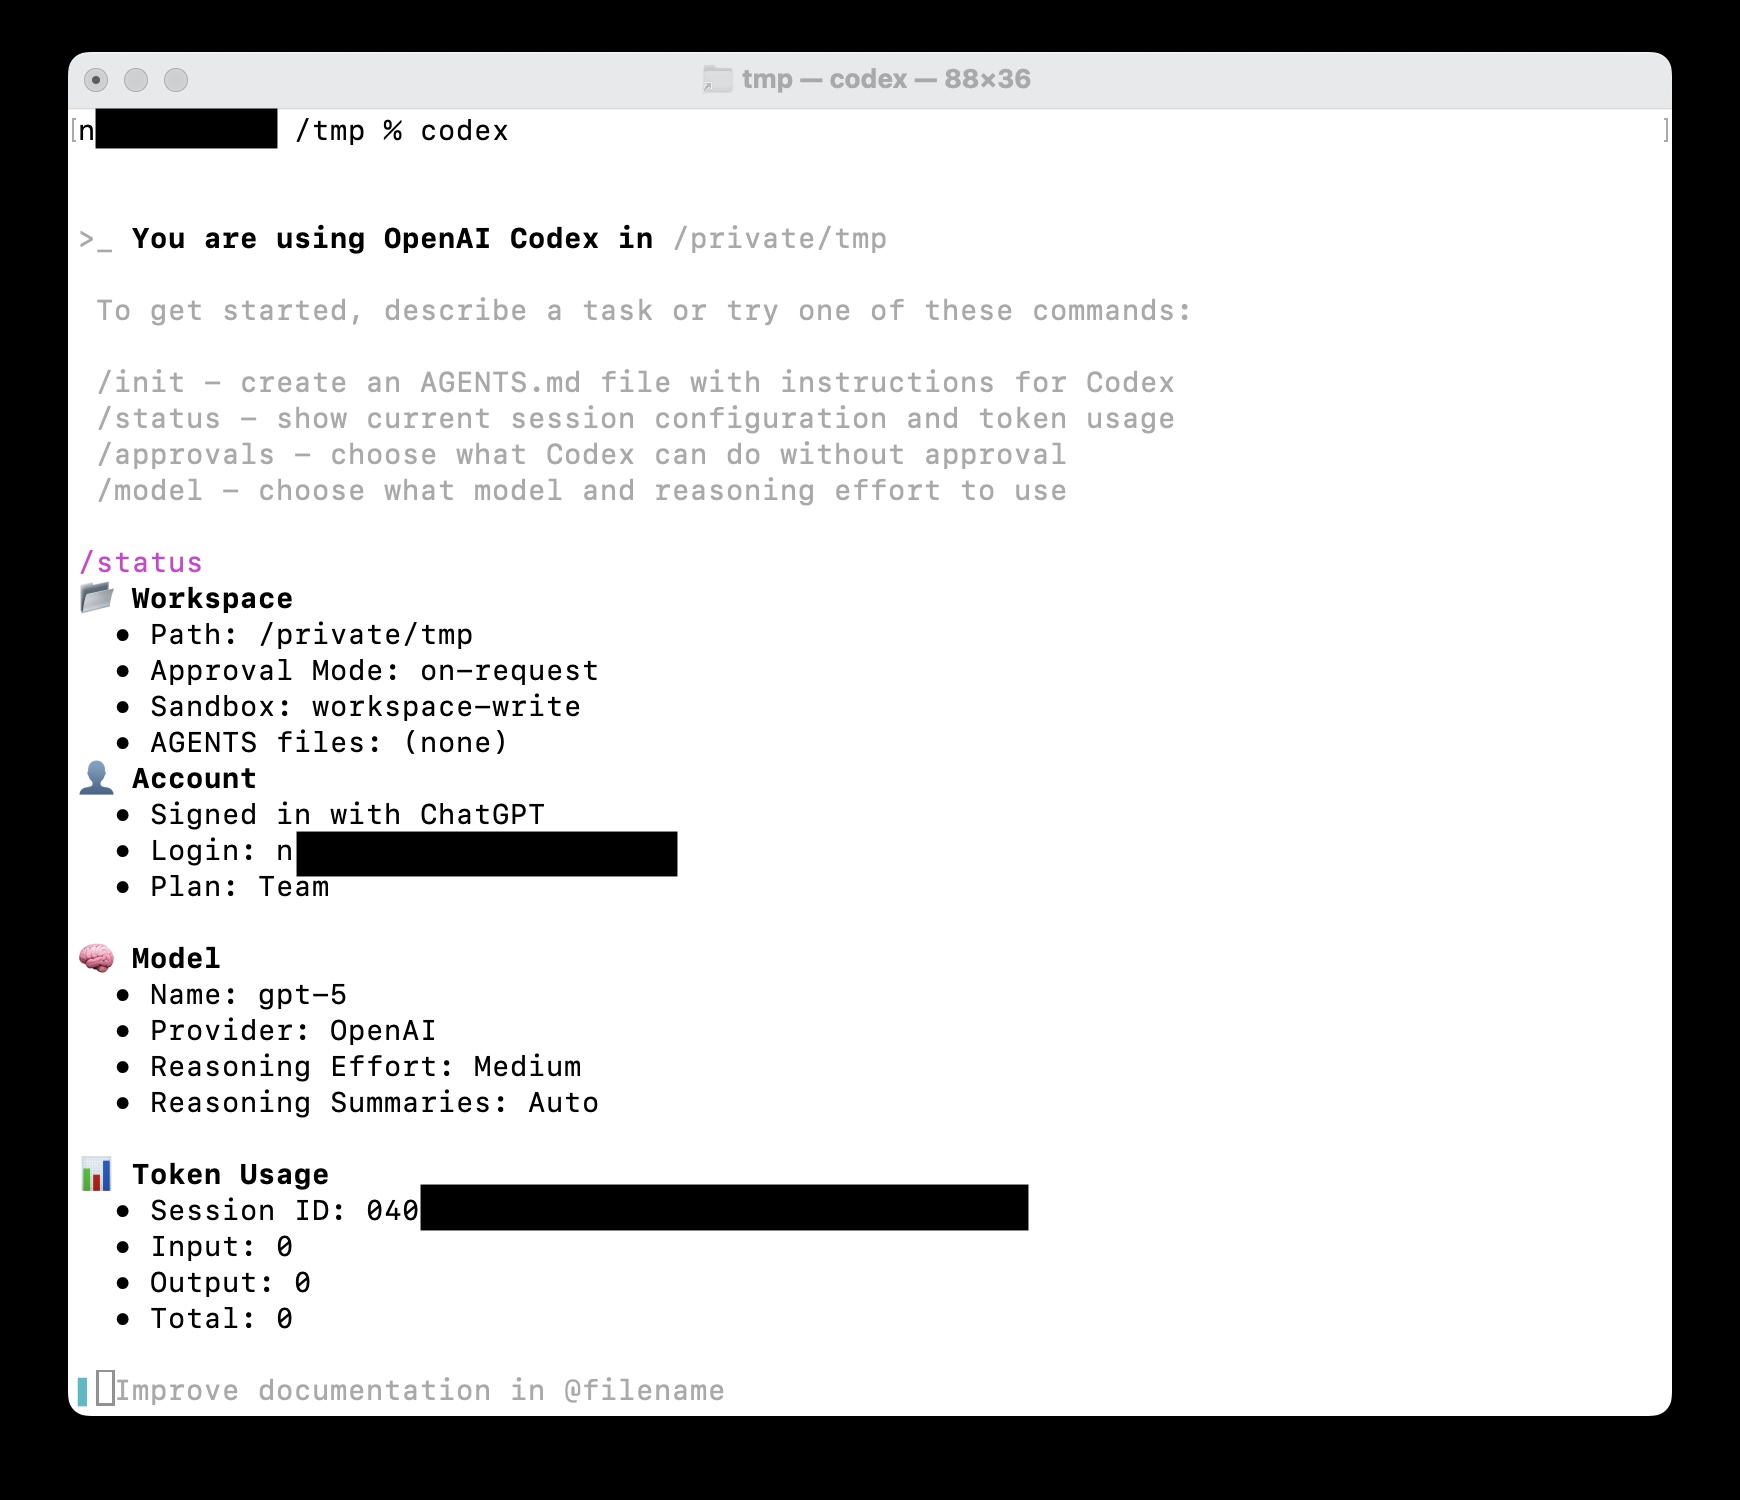
After installing, you may enjoy free use as part of a paid ChatGPT subscription. To connect Codex CLI with the ChatGPT account, run: codex login at the command line or use the “/login” command within Codex CLI. Usage limits are intransparent, but seem generous even with ChatGPT Plus or ChatGPT Team. Alternatively, Codex CLI should also continue to work on a pay-per-use basis through an API access key.
To confirm that you’re running the new Codex CLI, use --version:
% codex --version
codex-cli 0.25.0
Using Codex CLI for non-coding tasks
As Codex CLI has access to traditional Unix-tools (and on Windows also PowerShell) including the Python programming language, it can be used for higher-level tasks. For a recent research project with lots of data points, I could have loaded the results into a database - and use its built-in data-processing functions for evaluation. That’s what I’d always done. Now, I asked Codex CLI to pull the data from the individual JSON result files across different directories, build aggregates & additional computation and populate a Markdown file in a certain way. And it did.